Sunday, March 25, 2012

Vanilla Extract

Vanilla extract is an essential ingredient in any baked cookies whether in cookies, cakes or pies its everywhere! But its expensive! At least if you want good quality vanilla a small bottle of vanilla can cost you anywhere from 5 dollars which is a lot for that small amount that they give. Making your own vanilla extract is so much more cheaper, it may take a little while but it sure is worth it! All you need is vodka and vanilla beans. When buying vanilla beans, buy them online there so much cheaper then buying them in the grocery store i bought 8 vanilla beans for ten dollars which is not bad at all. Now I was inspired to make my own vanilla when a friend gave me a bottle of her own vanilla extract and trust me its better then the vanilla you buy in store! So I have the first step! and in four weeks I will show the finished results so be patient with me! And also when i made this I made two batches but make as much as you'd like!

Ingredients
3 vanilla beans
1 cup of vodka

What you will need for this recipes is one glass jar with a tight fitting lid. To put your extract in

Slice the beans in half and scrape all the seeds of the pod

Place the seeds and pods in your jar

Pour in the vodka

Cover with lid and shake

Place extract in cover and wait four about four weeks the longer the better though!

And when my extract is ready I will post the final picture!

Thursday, March 22, 2012

Chocolate Cake

Chocolate cake! I don't even know where to begin. Chocolate is just something that always make us feel at home. With a glass of milk what else can go wrong. Yes I know it is rich and sinful, and you probably won't feel so healthy afterwards but who cares. I only make this cake on special occasions so I feel its ok to indulge once in a while. And plus you can always go to the gym the next day. With chocolate cake (or any cake for that fact) I hate box mixes! I just don't like the texture of the cake! There just TOO moist! and soft. With any cake of mine I like them to be nice and dense I really don't want my cake to be falling apart before I can get it in my mouth. But hey thats just me. This does have lots of steps but there all very simple. And yes it does requires some cake assembly, but don't worry its easy. When I first made this it looked like the leaning tower of pisa. It was bad. But with practice I managed to make a ok cake. And don't worry if your cake doesn't turn out the way you want too. As long as it taste great your family and friends won't care how it looks. Its the thought that counts in the end!

Ingredients

 1 cup Coco powder
3/4 cup strong coffee, boiling
1 cup milk
2 3/4 cups cake flour
1 teaspoon baking soda
1/2 teaspoon salt
1 1/2 cups (3 sticks) unsalted butter, room temperature,
2 1/2 cups sugar
1 tablespoon pure vanilla extract
4 large eggs
           
            In a small bowl combine the coco powder and hot coffee and stir until the coco powered is well dissolved then add the milk

In an electric mix the butter, sugar
           
            Add the eggs and vanilla extract and mix for a few more minutes
           
            Then add the chocolate mixture to the butter, sugar and eggs and mix a few more minutes

Combine the flour, baking soda, and salt in another bowl and mix together, you can also sift it


            Carefully place the flour, baking soda, salt in and mix slowly so you don't cover yourself in flour. Don't mix this for to long or else you will have a tough cake


             In lightly greased 8 inch pans (I like to cover my pans with wax paper in the bottom, that way i ensure my cakes won't stick and fall apart) pour the batter evenly 


            Tap the pans a little on your counter just to get rid of any extra air bubble that might be in the cake


            Bake in 350 degree oven for 30 or until a toothpick come out clean if you need to bake it longer go ahead and bake in 5 minute intervals until a toothpick comes out clean

            Let the cakes cool completely and place in fridge just so that the cakes will be nice and firm, this will make covering in frosting a lot easier

           
            Frosting
            1 cup of coco
            4 cups powder sugar
            11/2 sticks of butter or 12 tablespoons
            1 teaspoon of vanilla
           
            Sift the coco and powder sugar in bowl to insure no lump in your frosting
           
            Add the butter, milk, and vanilla and mix until everything is well incorporated 
           
            Cut the tops of your cakes just to make sure you have a flat surface. If you can't get it exactly flat dont worry about it do the best you can
           
            Place a small amount of frosting in the center of the first cake and spread a small layer this will be the center frosting

           
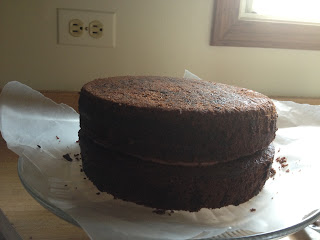
            Then take your other cake and place the cut side down. So that the flattest side is on the top
           
            Take the rest of your frosting and put it in the center of cake ( leave a little extra in the bowl) 
           
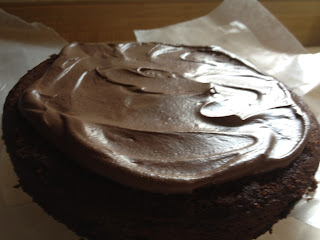
            Then with a spatula spread the frosting over the top and let the remaining fall over the sides of the cake
           
            Take the frosting thats falling on the sides and use that to spread on the side of the cake, use extra frosting if needed and take your time don't rush this

           
            Smooth out your frosting so it all looks even

           
            For best result refrigerate your cake before slicing into 
           
            And enjoy with a glass of cold milk!

And Remember it doesn't matter if it looks bad, I'm pretty sure your family and friends will appreciate the hard work you've done. And the taste will also make up for the appearance!

Wednesday, March 14, 2012

Strawberry Ice Cream

Yes you heard right strawberry ice-cream! Ice cream is so easy to make and so fun. You can really be as creative you want anywhere from the basic vanilla, chocolate or something special like raspberry sorbet. I will say one thing, the only way to make ice cream is to buy and ice cream maker. You may not want to buy one but trust me it is well worth the money and there really not that expensive for only fifty bucks i got my Cuisinart ice cream maker. And trust me when I say it is well worth it. Nothing beat the great taste of homemade strawberry ice-cream especially in a hot summer day. It will be worth the fifty dollars, you won't regret it. Trust me on that! I will also show you more ice cream flavors! and if you have suggestions please leave a comment.

Ingredients
1 Pint of Strawberries
3 Tablespoons of Lemon Juice
1 Cup of Sugar
2 Cups of half and half
1 Cup of heavy cream
1 Teaspoon Vanilla extract

Take your strawberries and slice the top off and slice the strawberries either very thinly or thick it depends on how you like your strawberries

In a bowl place your strawberries, 1/3 cup of sugar, and the lemon and stir. Place the strawberries in the fridge and them macerate for about two hours or more.


Mix together the half and half, cream, vanilla and the remaining 2/3 cup of sugar and mix with a whisk or until the sugar is well dissolved


Carefully pour the liquid from the strawberries into the cream mixture and mix, leave the strawberries in the bowl do not mix them with the cream mixture at this point the cream mixture will look a light pink


Pour the cream mixture into your ice cream maker and follow the instruction on your specific ice cream maker on how to make the ice cream. Each machine is different.


Before five minute after being done, pour the strawberries into the ice cream maker and let them keep on mixing for five minute or until done


Transfer the ice cream into a freezer safe container and let freeze until the ice cream is firm. You could also eat it right out of the ice cream maker it will be really soft though

Before enjoying your ice cream take fifteen minutes out before scooping so it will be easy to scoop. Enjoy


Monday, March 12, 2012

Granny Smith's Pancakes

Pancakes, one of the most simplest and easy recipes to make. I personally never like to use boxed pancake mix, to me I find it has no flavor sure it may be soft and fluffy but it sure does lack in flavor. Making your own pancakes insures that your pancake will be soft, fluffy and most importantly flavorful. And it only takes a few ingredients that you already probably have at home! These recipe is called granny smiths pancakes because I mix into the batter one granny smith apple! The addition of the apple takes these pancakes to a whole new level. It add a bit of a crunch and additional sweetness at the same time, of course if you did not want the apples you could always leave them out and you would still have a perfect pancake. Or you can even add whatever you would like, like for example chocolate chips. Theres really so much you can do with this basic recipe.


Ingredients
1 1/2 cups all-purpose flour
3 1/2 teaspoons baking powder
1 teaspoon salt
1 tablespoon white sugar
1 1/4 cups milk
1 egg
3 tablespoons butter, melted
1 granny smith apple
           
In a bowl combine the flour, baking powder, salt, and sugar
           
           
Make a well in the center of the dry ingredient and pour the milk, egg, and butter and mix. Don't over mix, over mixing will make very tough pancakes, which is something we don't want. Its ok if there are a few lumps left, they will cook out
           
Cut up your granny smith apple into small pieces

           
Combine the apple with the pancake mixture but again don't over mix


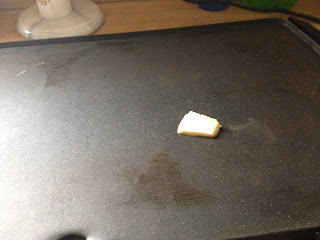
Place a pat of butter in a griddle. I like to cook my pancake in a griddle but you can always cook your in a skillet over your stove, but I think the griddle cooks the pancakes evenly


Using a ice cream scoop i pour the batter in the griddle. I use an ice scoop because its easy and to scoop and they all come out the same size


After a few minute the pancakes will begin to bubble and their edges will look cooked and that point you can go ahead and flip


Cook for another minute or two or until golden brown on the other side and remove to plate
           
You can enjoy these with maple syrup or just simply with butter like I do! Enjoy


Saturday, March 10, 2012

Crepes

Crepes theirs only one word I can use to describe the feeling of eating a warm crepe YUM! These are delicious. And like most other foods I did not grow up eating crepes. The first time I heard about crepes was in my french class in high school. Some one brought them in and i had it for the first time. I had to get the recipe and I did. And ever since then I've been making them at least once a month! You can eat these crepes as is, as my parents like to do, but these will taste even better smothered with nutella. The two combined will melt your mouth when you eat this heavenly dessert.


Ingredients: 
2 large eggs
3/4 cup milk

  • 1/2 cup water
  • 1 cup flour
  • 3 tablespoons melted butter
  • 3 tablespoons sugar
  • 1 teaspoon vanilla

In a blender combine the eggs, milk, water, butter, sugar, and vanilla and mix on low speed

Then add the flour and mix for 20 seconds. Don't over mix. Place the batter in the fridge for 1 hour or more

Place a medium non stick pan over high heat and put a tablespoon of butter until melted

Add a quarter of a cup of the batter and swilr the pan to make sure that you have a thin layer of batter. 

Cook for about 30 second or until it begins to brown around the edges, then with a small butter knife or spatula loosen the sides of the crepe and flip. I personally like to flip my crepes with my hands but you can flip it using your spatula


On the other side cook for only about 20 seconds. The second side will cook a lot quicker then the first.

Remove from pan and enjoy warm or let them cool. At this point you can spread whatever you want anything from nutella, jam or jellies or even ice cream! Enjoy!


Friday, March 9, 2012

Snicker-doodle Cookies

Snickerdoodle cookies are one of my favorite cookies of all time. The first time i ever had a snicker doodle cookie was in my culinary arts class in high school, and I've been making them ever since. I love their simplicity, you don't need to go out and get any special ingredients, well except the cream of tartar but once you buy one container of cream of tartar you'll have it for a while since it is not used a lot. The cinnamon coating is the best part of the cookies the smell of cinnamon in the oven always make me feel nice and warm, especially in a chilly day. Heres a tip, using a cooking scoop makes shaping your cookies more efficient and quickly so its well worth the money!

Ingredients

  •  1/2 cup butter, softened
    • 1/2 cup shortening
    • 1 1/2 cups white sugar
    • 2 eggs
    • 2 teaspoons vanilla extract
    • 2 3/4 cups all-purpose flour
    • 2 teaspoons cream of tartar
    • 1 teaspoon baking soda
    • 1/4 teaspoon salt
    • 3 tablespoons white sugar
    • 2 teaspoons round cinnamon


  • Heat your oven to 400 degrees

Mix together the butter, shortening, sugar, eggs, and vanilla in a stand mixer or by hand 

Add the flour, cream of tartar, baking soda, and salt and mix just until the dough comes together. Don't over mix it or else your cookies will be tough

Stir together the three teaspoons of sugar and cinnamon

Using a cookiescoop drop the dough into the cinnamon sugar mixture and place in cookie sheet

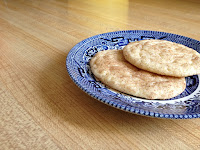
Bake! Heres what I found when baking these if you bake them for eight minutes you will get a fluffy and they cookie and if you bake them for ten minute you will get a crispier cookie. So you choose what kind of cookie you want. I personally like mine chewy.


Once their out of the oven let them cool and enjoy with a nice glass of milk!